Pre-outs are audio outputs that bypass the built-in amplifier of an AV receiver, allowing you to use an external amplifier to power your speakers. This can be useful for achieving higher power output and better sound quality or for driving specialized speakers that require a separate power source.
In this article, I’ll tell you what is a pre-out on an AV receiver, what types of them you can find, which pros and cons they have, and how to connect an external amplifier to your AVR with pre-outs.
What do pre-outs do?

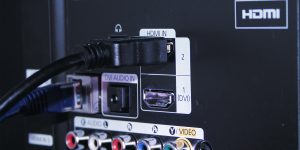
Pre-outs refer to the audio output connections found on audio and video equipment, such as amplifiers and receivers. As I have said, the function of the pre-out port in an AV receiver is to connect additional external amplifiers or speakers to enhance the audio performance.
When connected to external amplifiers or speakers, the signal can be further amplified to drive the speakers and produce sound. By utilizing pre-outs, you can tailor your audio systems to their preferences, adding or upgrading amplifiers and speakers for improved performance and customization.
What are the types of pre-outs?
There are various types of pre-outs commonly found in audio systems. These pre-outs serve different purposes and provide connectivity options for different components. Here are the basic types of pre-outs:
| Types of pre-outs | Description |
|---|---|
| Subwoofer pre-out | It is specifically designed to connect a subwoofer to your audio system. |
| Front pre-out | This type is used to connect the front speakers of a multi-channel audio system. |
| Center pre-out | In a surround sound setup, this pre-out is used to connect the center speaker. It provides a dedicated channel for dialogue and center-focused audio. |
| Rear pre-out | This pre-out is used for connecting rear speakers in a surround sound system. |
| Zone pre-out | Some audio systems feature a zone pre-out, which allows you to connect and control audio in a separate zone or room. |
| Pre-out/pre-in loop | This type of pre-out/pre-in loop is commonly found in amplifiers and receivers. It allows you to connect external audio processors, equalizers, or other devices between the pre-out and pre-in connections. |
These are just a few examples of the different types of pre-outs commonly available in audio systems. The specific types and configurations may vary depending on the equipment and manufacturer.
What are the advantages and disadvantages of pre-outs?
Let’s take a closer look at the advantages and disadvantages of using a receiver with preamp outputs. For clarity, I have prepared a table for you:
| Advantage | Pros of pre-outs |
|---|---|
| Flexibility | Provide flexibility to customize and upgrade your audio setup according to your preferences. |
| Improved sound quality | You can offload the amplification process to external amplifiers, which are often of higher quality than built-in amplifiers. |
| Power and volume control | Allow you to control your audio system’s power and volume levels more precisely. |
| Multi-zone audio | Enable you to create multi-zone audio systems where you can simultaneously play different audio sources in different areas of your home or vehicle. |
| Integration with external devices | Facilitate the integration of external devices, such as equalizers, crossovers, or audio processors. |
| Disadvantage | <и>Cons of pre-outs |
|---|---|
| Additional Cost | Often require purchasing external amplifiers or processors, which can add to the overall cost of your audio system. |
| Complexity | Can increase the complexity of your audio system setup. |
| Space requirements | May require additional space in your setup, especially if you have limited room. |
| Potential compatibility issues | Not all audio systems or devices support pre-outs, so compatibility issues may arise when attempting to connect external components. |
| Limited improvement in entry-level systems | In entry-level audio systems with lower-quality built-in amplifiers, the benefits of pre-outs may be less noticeable. |
Note that the pros and cons of an AV receiver with pre-outs mentioned here are general considerations and may vary depending on specific audio systems and setups.
When should I use an external amplifier with my AV receiver?

Actually, it’s an interesting question. So, let’s consider some cases when you should use an external amplifier.
Power needs
Different speakers have different power requirements and impedance levels, and your AV receiver may not be able to provide enough power to drive your speakers to their full potential. In such cases, adding an external amplifier can provide the extra power necessary to get the best sound quality from your speakers.
Bi-amping or tri-amping
Some speakers have multiple sets of binding posts that allow for bi-amping or tri-amping. This means using separate amplifiers for different frequency ranges, which can improve overall sound quality and clarity.
Multi-room audio
If you have a multi-room audio setup, an external amplifier can power additional speakers in other rooms without sacrificing sound quality in your main listening area.
Custom home theater
If you have a custom home theater with unique speaker configurations, an external amplifier may be necessary to properly power all of the speakers and achieve optimal sound quality.
How can I connect an external amplifier to my AV receiver?

I want to please you with the fact that it is very simple in fact. So now I will share with you a simple instruction. It will help you quickly and correctly cope with this task.
Steps for connecting pre-outs to an external amplifier
Follow my guide to learn how to connect pre-outs to an external amplifier!
| Step | Description |
|---|---|
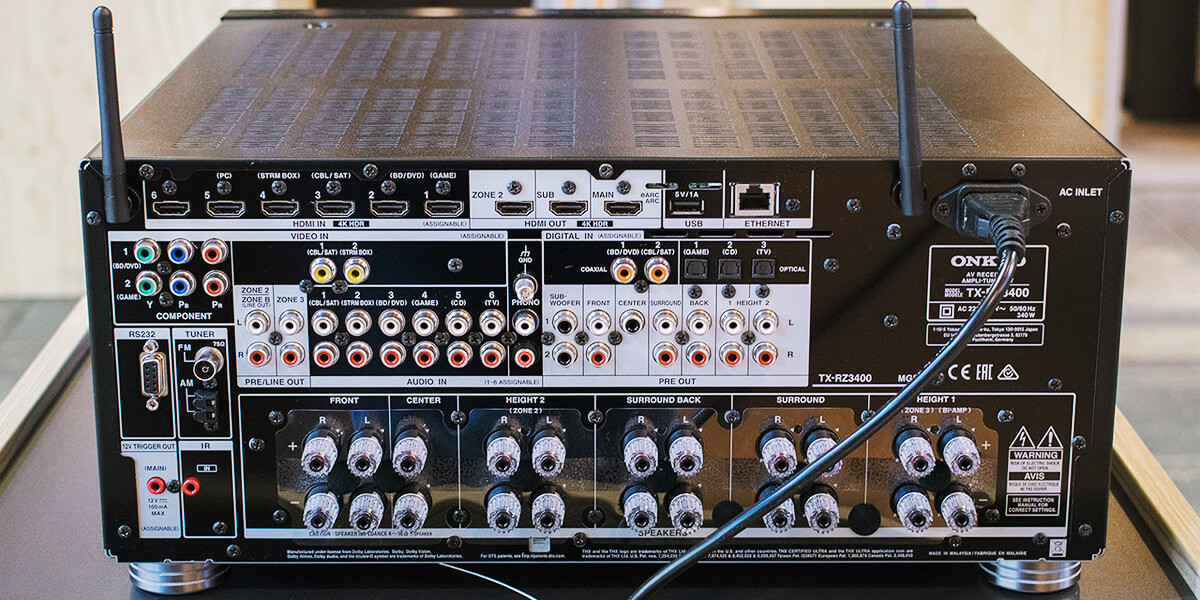
| 1 | Identify the pre-out connections on your audio source. |
| 2 | Ensure that your external amplifier is powered off. |
| 3 | Connect the pre-out cables from the audio source to the corresponding inputs on the amplifier. |
| 4 | Verify that the connections are secure and properly seated. |
| 5 | Turn on the external amplifier and set it to the desired volume level. |
| 6 | Adjust the audio source’s output level or volume control as needed. |
| 7 | Test the system by playing audio and checking for proper sound output. |
| 8 | Fine-tune the amplifier and audio source settings for optimal sound quality, if necessary. |
| 9 | Enjoy your enhanced audio experience with the external amplifier! |
Remember to consult the user manuals of your audio source device and external amplifier for specific instructions or additional settings that may be required for optimal performance.
What should I take into account when opting for an external amplifier for an AV receiver?
In this place of article, I want to talk with you about some cases when you can select an external amplifier for your AV receiver. Among them are:
- Power output: It should be sufficient to drive your speakers. Make sure to match the impedance of your speakers with that of the amplifier.
- Number of channels: It should match the number of speakers in your setup. For example, a 5.1 system will require a 5-channel amplifier.
- Compatibility: Check the compatibility of the amplifier with your AV receiver. Look for the type of connection needed, such as RCA or XLR.
- Brand: Consider choosing an amplifier from the same brand as your AV receiver for optimal compatibility.
- Budget: Amplifiers can range greatly in price, so consider your budget before making a purchase.
- Sound quality: Look for an amplifier that provides the desired sound quality. Consider reading reviews and listening to demonstrations before making a decision.
- Features: Some amplifiers come with additional features, such as built-in DACs or EQ settings. Consider if these features are important for your setup.
What mistakes should I avoid when connecting an external amplifier to an AV receiver
And finally, I would like to talk to you about some mistakes users make when connecting an external amplifier to their AV receivers.
- Mismatched impedance: The impedance of the external amplifier and the AV receiver should match. Otherwise, it can cause damage to both devices and can also degrade the sound quality.
- Not turning off the power: Before connecting or disconnecting an external amplifier to the AV receiver, make sure that both devices are turned off. Otherwise, it can cause a power surge that can damage the devices.
- Incorrect cabling: It is important to use the correct cables to connect the external amplifier to the AV receiver. Using incorrect or poor-quality cables can cause signal degradation and poor sound quality.
- Improper gain structure: Gain structure refers to the proper level settings of each device in the audio chain. The improper gain structure can result in distorted or weak sound quality.
- Not checking for grounding issues: Grounding issues can cause a hum or buzzing in the audio signal. It is important to check for grounding issues before connecting the external amplifier to the AV receiver.
- Overdriving the amplifier: Overdriving the amplifier can cause distortion and damage to the speakers. It is important to ensure the amplifier is not overdriven and can handle the speakers’ power needs.
So, I’ve told you about pre-outs, how they work, what types of pre-outs exist, and their pros and cons. I hope my tips and life hacks will help you better understand the topic and choose the right devices.